")
 Deutsch (Deutschland)
 Français (Belgique)
 Nederlands (België)


CREATING A SUSPENDED CEILING: HOW TO DO IT

Opting for a suspended ceiling is a good way to nicely conceal the concrete surface and any supporting beams. Building the necessary batten structure on which MDF or plasterboard is affixed can also have the added advantage of hiding electrical wires and other pipes. And the instructions below show how you can easily do that yourself.
Make your own suspended ceiling
Step 1
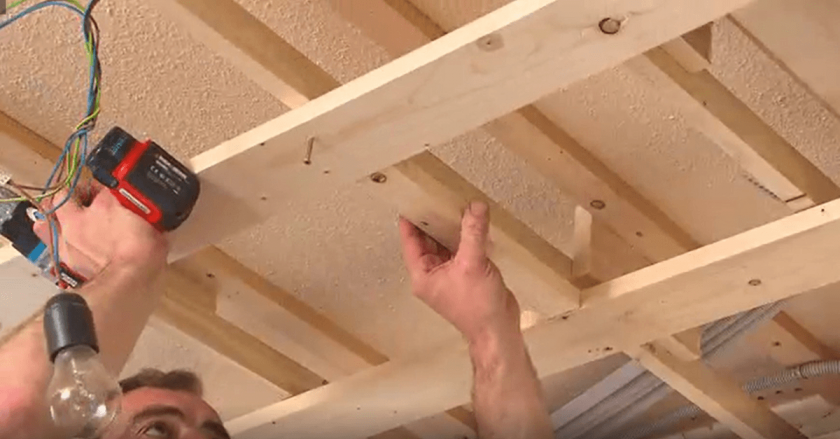
Mount 32 x 50 mm beams on the concrete ceiling.Step 2
Then mount 22 x 50 mm pieces of batten vertically on these beams. The length of these battens depends on how low you want to make the ceiling. A new layer of beams is then created under the existing ceiling.With a wooden beam layer, the pieces of batten can be mounted directly on the beam layer.
Step 3
A transverse rail measuring 32 x 50 mm is mounted on this batten.Step 4
Another transverse rail of 32 x 50 mm is mounted at right angles to the first transverse rail.Step 5
A batten structure (battens of 22 x 50 mm) is placed on this transverse rail with a gap of 30-40 cm between each batten for the MDF panels or plasterboards. The distance between the battens depends on the thickness of the panels used.
Finishing the suspended ceiling: MDF, PVC or plasterboard
MDF ceiling panels are supplied with a ready-to-go decorative finish. This means you no longer need to fill and paint after assembly. These panels are available in various sizes and finishes.
PVC panels are also suitable for finishing a false ceiling. These panels are ideal in humid conditions, such as in the kitchen or bathroom.A ceiling can also be lowered using plasterboards. After installation, these plasterboards will still need to have a finish applied: fill the screw holes, close the seams, apply one coat of primer and two coats of paint.
Lowering the ceiling in your living room or kitchen
A suspended ceiling can be installed in almost any room: the living room, kitchen, bathroom or bedroom. When choosing the finish, the type of room must be taken into account: i.e., choose a product that is resistant to damp conditions for the bathroom and kitchen.Costs of a suspended ceiling
MDF ceiling panels are quick and easy to mount yourself using special metal clips or with nails and staples. The ceiling is ready immediately after installation, no finishing of the panels is required after installation. They are available in all price ranges.PVC panels are also ready immediately after installation. They are easily mounted using nails, staples or glue.
Fitting a plasterboard ceiling usually requires 2 people. In addition, the panels still have to be completely finished after installation. Plasterboard is therefore more labour-intensive, and installation takes much more time. This method may seem like a cheaper alternative to the ready-to-use MDF or PVC ceiling panels, but when you add up all the additional costs for the finishing, there is no difference.
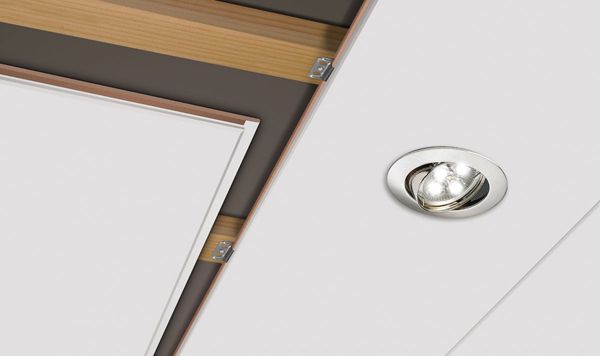
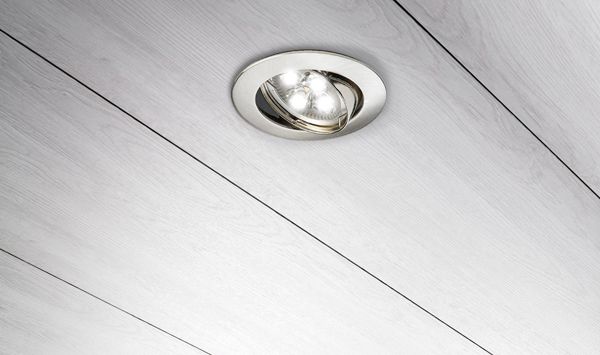
Spots in a suspended ceiling
Spots and ventilation openings are easy to install in a dropped ceiling. Before installing the ceiling, decide where the spots or ventilation should be. Make sure there is an electricity supply in place before installing the ceiling, and pull the wire through the hole later.
You can use a hole drill to make a hole with the desired diameter in the material. It is best to use LED spots, they do not get hot and will not damage the MDF or plaster ceiling.
You can use a hole drill to make a hole with the desired diameter in the material. It is best to use LED spots, they do not get hot and will not damage the MDF or plaster ceiling.