
")
 English (United Kingdom)
 Français (Belgique)
 Nederlands (België)


AQUA-STEP BOARDS: THE IDEAL SOLUTION FOR WALLS OF BATHROOMS AND OTHER ROOMS

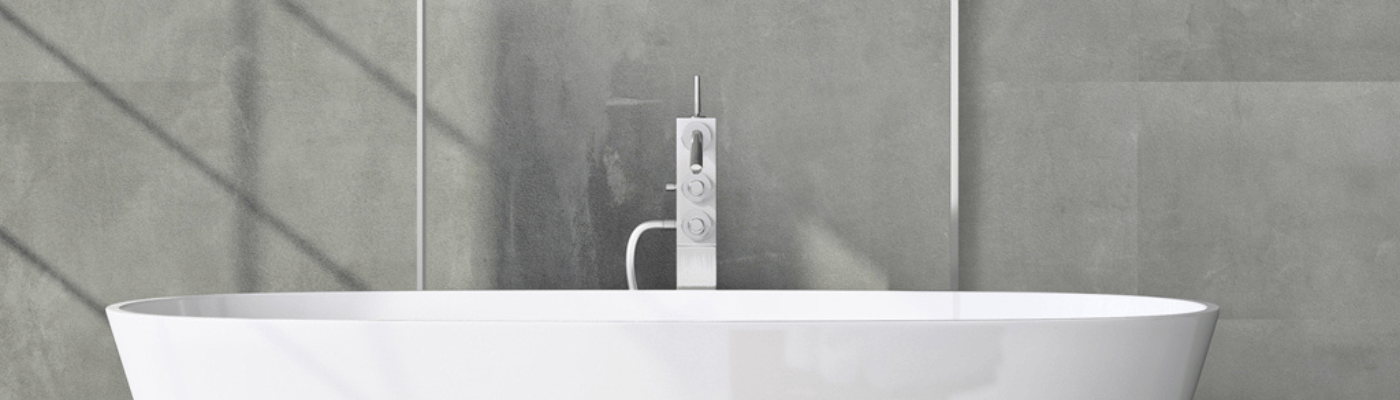
Aqua-Step board sheet material has a rigid, solid 4mm SPC core, which is impact resistant, stable and strong. The high-tech vinyl top layer makes these boards scratch-resistant and durable. They are waterproof and therefore ideal for all conditions, including the bathroom, kitchen, and basement. Due to the large size (261.5 x 96.5 cm) and the 4mm thickness, walls can be finished quickly and, if desired, seamlessly, often over tiles, etc. The Aqua-Step boards are cut straight and glued to the wall. But how do you install these types of boards in the right way? Read it below.
The subfloor must be dry and free from dust and dirt. Check the wall for flatness. The uneveness should not exceed 3mm under a straight ruler of 1 meter, even up if necessary.
Panels can be cut to size using a try square and a Stanley knife. The panel is cut and then broken over the breaking line. Degrease the wall and the back of the panels.
Installation of the Aqua-Step boards
Take a ruler and a spirit level and draw a reference line with a pencil before starting the fitting. Leave a 5mm expansion gap open on all sides. Apply adhesive with a cartridge gun on the back of the panel all around and in the middle as shown in the figure. Press the panel for 5 seconds after fitting. Keep a cleaning product at hand for removing excess adhesive. When fitting on a plaster board base make sure the joints of the tiles do not coincide with the seams of the plaster boards.
The boards can be installed with a PVC connection profile or seamlessly. For a watertight connection, a thin strip of silicone should be applied on both sides of the profile.
When installing seamlessly, a strip of silicone is applied to the long side of the board that has already been installed. Apply glue to the back of the second plate and slide it against the first plate. Immediately remove the excess silicone. It is also possible to place spacers for tiles between the boards and then fill the joint later with silicone.
Check after every row if the seams are perfectly aligned and if the panels are still level before the adhesive is dry.
Holes for piping, screws or joinings: drill the holes in the panels before installation. Use an appropriate tool. The diameter of the holes must be at least 10 mm larger than the hose or joining. Fill the hole up with moisture resistant silicone after fixing the panels.
For finishing in a shower use a moisture resistant silicone between wall and shower tray. For finishing the ceiling use silicone or a suitable profile which is glued onto the panels.
Before you start
The following tools are needed: set square, tape measure, spirit level, glue gun, adhesive Aqua-Step polymer, saw or Stanley knife and a pencil.The subfloor must be dry and free from dust and dirt. Check the wall for flatness. The uneveness should not exceed 3mm under a straight ruler of 1 meter, even up if necessary.
Panels can be cut to size using a try square and a Stanley knife. The panel is cut and then broken over the breaking line. Degrease the wall and the back of the panels.
Installation of the Aqua-Step boards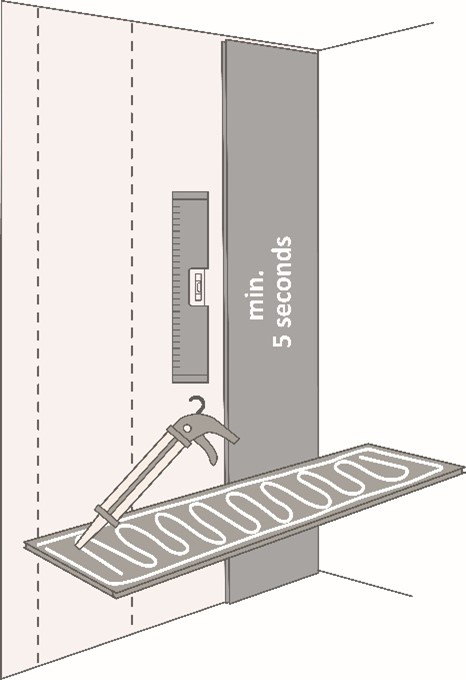
Take a ruler and a spirit level and draw a reference line with a pencil before starting the fitting. Leave a 5mm expansion gap open on all sides. Apply adhesive with a cartridge gun on the back of the panel all around and in the middle as shown in the figure. Press the panel for 5 seconds after fitting. Keep a cleaning product at hand for removing excess adhesive. When fitting on a plaster board base make sure the joints of the tiles do not coincide with the seams of the plaster boards.The boards can be installed with a PVC connection profile or seamlessly. For a watertight connection, a thin strip of silicone should be applied on both sides of the profile.
When installing seamlessly, a strip of silicone is applied to the long side of the board that has already been installed. Apply glue to the back of the second plate and slide it against the first plate. Immediately remove the excess silicone. It is also possible to place spacers for tiles between the boards and then fill the joint later with silicone.
Check after every row if the seams are perfectly aligned and if the panels are still level before the adhesive is dry.
Finishing
PVC profiles and matching SPC skirting board, inside/outside corners and cover mouldings are available for finishing Aqua-Step boards. These are installed with adhesive. It is also possible to finish with moisture-resistant silicone.Holes for piping, screws or joinings: drill the holes in the panels before installation. Use an appropriate tool. The diameter of the holes must be at least 10 mm larger than the hose or joining. Fill the hole up with moisture resistant silicone after fixing the panels.
For finishing in a shower use a moisture resistant silicone between wall and shower tray. For finishing the ceiling use silicone or a suitable profile which is glued onto the panels.